How to Make a Sphere in SOLIDWORKS
Contents
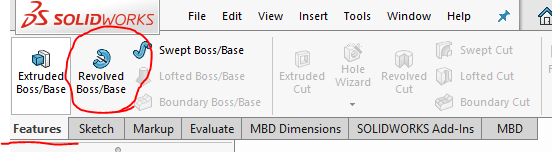
The most common way to make a sphere in SOLIDWORKS is to sketch a half circle and revolve it around a centerline. The Revolved Boss/Base feature turns the 2D profile into a round solid body.
This method is simple, stable, and easy to edit because the sphere diameter is controlled by the sketch dimension.

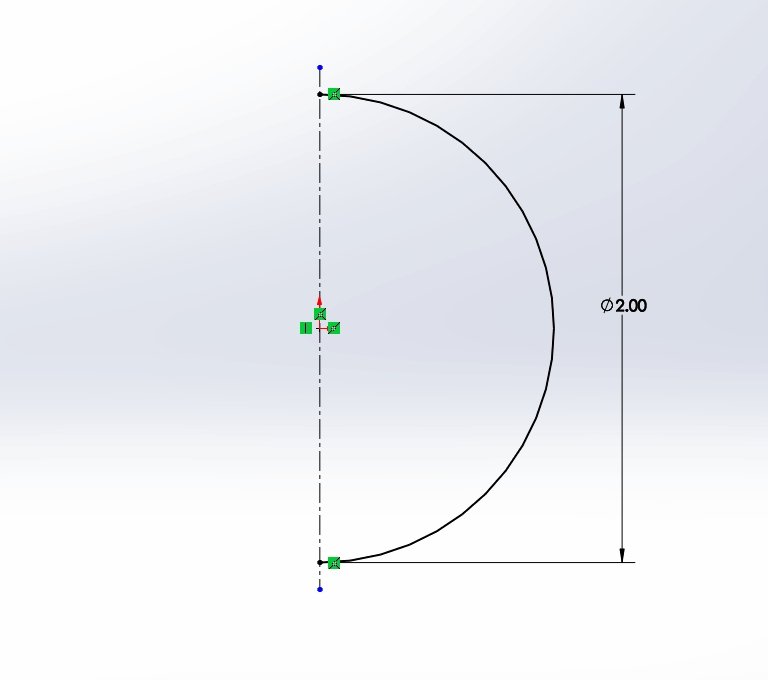
Sketch the sphere profile
- Start a new part.
- Choose a plane and start a sketch.
- Draw a vertical centerline through the origin.
- Draw a half circle with its flat side on the centerline.
- Dimension the radius or diameter.
- Trim or close the sketch so it has a valid profile.
Revolve the profile
- Exit the sketch or keep it active.
- Click Features > Revolved Boss/Base.
- Select the centerline as the axis of revolution.
- Set the revolve angle to 360 degrees.
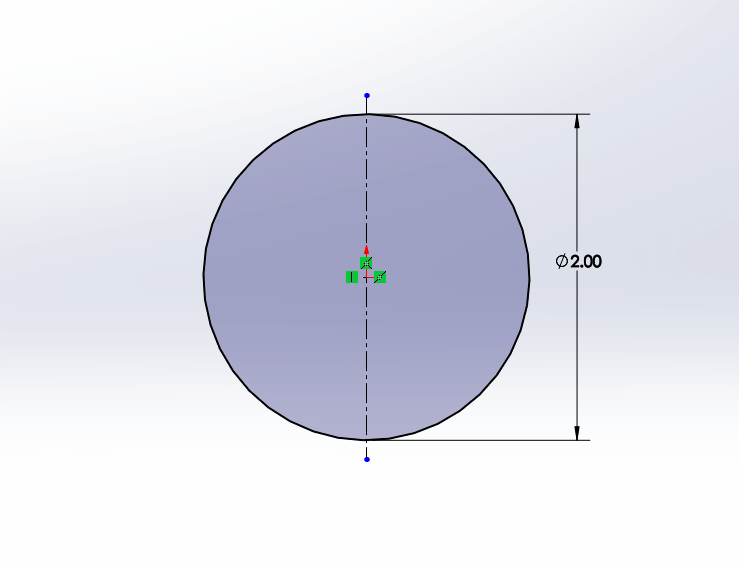
- Preview the sphere and accept the feature.
Control the sphere size
To change the sphere size later, edit the original sketch and change the radius or diameter dimension. This is more reliable than scaling the finished body because the feature remains driven by the sketch.
Make a hollow sphere
To make a hollow sphere, you can use a Thin Feature during the revolve, shell the finished sphere, or revolve a profile that already includes wall thickness. The best option depends on whether you need a simple visual model or a manufacturable hollow part.

Troubleshooting sphere features
- The revolve fails: make sure the profile is closed and does not cross the revolve axis.
- The result is only a surface: check whether Thin Feature or surface options were enabled.
- The sphere has a seam: a revolve creates a seam where the profile closes; this is normal.
- The size is wrong: edit the sketch dimension rather than scaling the body.

For related shape tools, see how to make a cone in SOLIDWORKS and how to make a dome in SOLIDWORKS.

Reference: SOLIDWORKS Help explains Revolved Boss/Base as a feature that revolves a sketch profile around an axis to create solid geometry.


