How to Change Material in SolidWorks?
Contents
Let’s learn how to change material in SolidWorks! Changing material in SolidWorks influences the mass properties of the part. More dense materials will make the part weigh more. Also, some materials require painting before being used in a product, which will increase the cost.
Here is an example of the FeatureManager design tree showing a part with Plain Carbon Steel as a material.

If you right-click on the displayed material a new menu will open up with options on how to change the material.
If the material you are looking for is displayed on this menu, you can select it with a mouse. If it is not, select the Edit Material option which will open the following screen.

On the left-hand side, you can browse materials and find the one you need. For quick search, you can use the search bar. This will quickly filter all available materials.

In the above example typing in T6 will find all aluminum material with a T6 in the name of the material.

Selecting the material that you want and clicking on the Apply button will change the material used in the part. Click Close to close the screen.
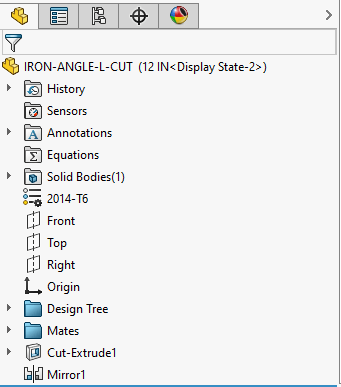
Here is the new material selected in the FeatureManager Tree.
There are different ways to access the material settings in SolidWorks, including via the feature tree and the task pane. Here’s a more detailed description of each:
- Feature Tree:
- The Feature Tree is the column on the left side of the SolidWorks window, where the design’s features are listed.
- You can access the material settings by expanding the Material folder in the Feature Tree to reveal the current material of the part or assembly.
- Right-click on the current material and select “Edit Material” to open the Material Properties window.
- Task Pane:
- The Task Pane is a panel on the right side of the SolidWorks window where frequently-used SolidWorks tools and commands are listed.
- To access the Material settings, click on the Material icon in the Task Pane, which looks like a green sphere.
- The Material dialog box will appear, where you can browse the material library or create custom materials.
Both options are equally effective for changing materials in SolidWorks, and it comes down to personal preference which one to use. Some users prefer the Feature Tree because it allows them to see the material applied to the part or assembly, while others prefer the Task Pane because it offers a larger workspace to view the available materials.
How to Browse, Search, and Add Materials in SolidWorks
Here are some instructions for browsing through the material library, searching for a specific material, and adding custom materials in SolidWorks:
- Browsing through the material library:
- In the Material dialog box, select a category from the drop-down list on the left-hand side. Categories may include metals, plastics, or woods.
- You can then browse through the available materials by scrolling through the list or using the arrow buttons.
- Hovering your cursor over a material will display a preview of the material in the preview pane on the right-hand side.
- Searching for a specific material:
- If you know the name or properties of the material you’re looking for, you can use the search bar at the top of the Material dialog box.
- Enter the name or properties of the material and click the magnifying glass icon to search. Any materials that match your search terms will appear in the list.
- Adding custom materials:
- If the material you need isn’t in the library, you can create a custom material.
- In the Material dialog box, click on “Edit Material” at the bottom of the list to open the Material Editor window.
- Choose a base material that is similar to the material you want to create.
- Adjust the material properties, such as color, density, and thermal conductivity, to match the properties of the material you want to create.
- Click “Save As” and give the material a name.
- The new custom material will now be available in the Material library under the “Custom Materials” category.
By following these instructions, you should be able to find the material you need in SolidWorks or create your own custom material. Remember to choose the correct material for your project, as it can have a significant impact on the final design.
Beyond Material Selection: Mastering Opacity, Color, and Texture in SolidWorks
In addition to selecting a new material, there are additional settings in SolidWorks that you may need to adjust, such as opacity or color, depending on your design needs. Here’s a brief overview of these settings:
- Opacity:
- The opacity setting controls how transparent or opaque the material appears.
- To adjust the opacity, select the part or assembly and open the Material Properties window.
- Use the Opacity slider to increase or decrease the transparency of the material.
- Color:
- The color setting controls the appearance of the material’s surface color.
- To adjust the color, select the part or assembly and open the Material Properties window.
- Use the Color Picker tool to choose a new color or enter the RGB values manually.
- Texture:
- The texture setting controls the appearance of the material’s surface texture, such as smooth or rough.
- To adjust the texture, select the part or assembly and open the Material Properties window.
- Use the Texture dropdown menu to choose a new texture, or use the Advanced tab to adjust the mapping and orientation of the texture.
By adjusting these additional settings, you can further customize the appearance of the material to better match your design needs. However, keep in mind that some settings may impact the rendering or performance of your model, so it’s important to find the right balance for your design.
Efficient SolidWorks Material Management
Here are some tips for organizing and categorizing saved materials in SolidWorks:
- Use Descriptive Names:
- When saving custom materials, give them descriptive names that accurately reflect their properties or intended use.
- Avoid generic or unclear names, as they can make it difficult to find the right material in the future.
- Create Folders:
- Use folders to group similar materials together, such as all metal materials or all custom materials.
- You can create new folders in the Material library by right-clicking and selecting “New Folder.”
- Use Favorites:
- Mark frequently-used materials as favorites to quickly access them in the future.
- To add a material to your favorites, select the material and click the “Add to Favorites” button at the bottom of the Material Properties window.
- You can also create a separate favorites folder to keep all your frequently-used materials in one place.
- Regularly Clean Up:
- Over time, your Material library can become cluttered with unused or redundant materials.
- Periodically review your saved materials and delete any that are no longer needed.
- This can make it easier to find the materials you do need and keep your Material library organized.
By following these tips, you can keep your Material library in SolidWorks well-organized and easy to navigate, which can save time and reduce frustration when working on projects.


