The Ultimate Guide to SOLIDWORKS Mouse Settings: Customization Tips and Tricks
Contents
SOLIDWORKS is a powerful 3D CAD platform used by engineers, designers, and manufacturers to build parts, assemblies, and drawings with precision. With that power comes a familiar challenge: the more capable the tool, the more time you can lose hunting through menus, switching modes, and repeating the same navigation moves hundreds of times a day.
One of the fastest ways to make SOLIDWORKS feel “lighter” is to tune how you navigate and trigger commands. The goal is simple: reduce mouse travel, reduce clicks, and make common actions feel automatic. Thoughtful mouse setup can also help you work more comfortably by minimizing awkward wrist positions and repetitive micro-movements—especially during long design sessions.
This guide walks through the most important SOLIDWORKS mouse behaviors (rotate, pan, zoom), the customization options that actually provide the biggest payoff (mouse gestures, shortcut bars, keyboard shortcuts, macros), and practical troubleshooting steps when something feels laggy or inconsistent.

Understanding SOLIDWORKS Mouse Settings: What You Can (and Can’t) Customize
In SOLIDWORKS, “mouse settings” typically fall into three buckets:
- View manipulation (rotate, pan, zoom): how you move around the model.
- Command access (mouse gestures, shortcut bars, context toolbars): how you trigger tools quickly.
- System behavior (zoom direction, graphics performance): options that affect how movement feels and whether it stays smooth.
Core view manipulation (rotate, pan, zoom)
Before you customize anything, it helps to lock in the “muscle memory” fundamentals. For many users, the biggest speed improvements come from cleaner navigation rather than adding more command shortcuts.
- Rotate view is commonly done by dragging with the middle mouse button (MMB) in parts and assemblies.
- Pan is commonly done by holding Ctrl and dragging with MMB. (In an active drawing, you typically do not need Ctrl.)
- Zoom can be done with the mouse wheel, and in many setups also by holding Shift and dragging with MMB for a controlled zoom in/out.
- Zoom to Fit is a key reset tool—use it whenever the model “disappears” off-screen.
- Zoom to Selection is one of the cleanest ways to focus on a specific feature, part, or subassembly without over-zooming or panning across a large model.
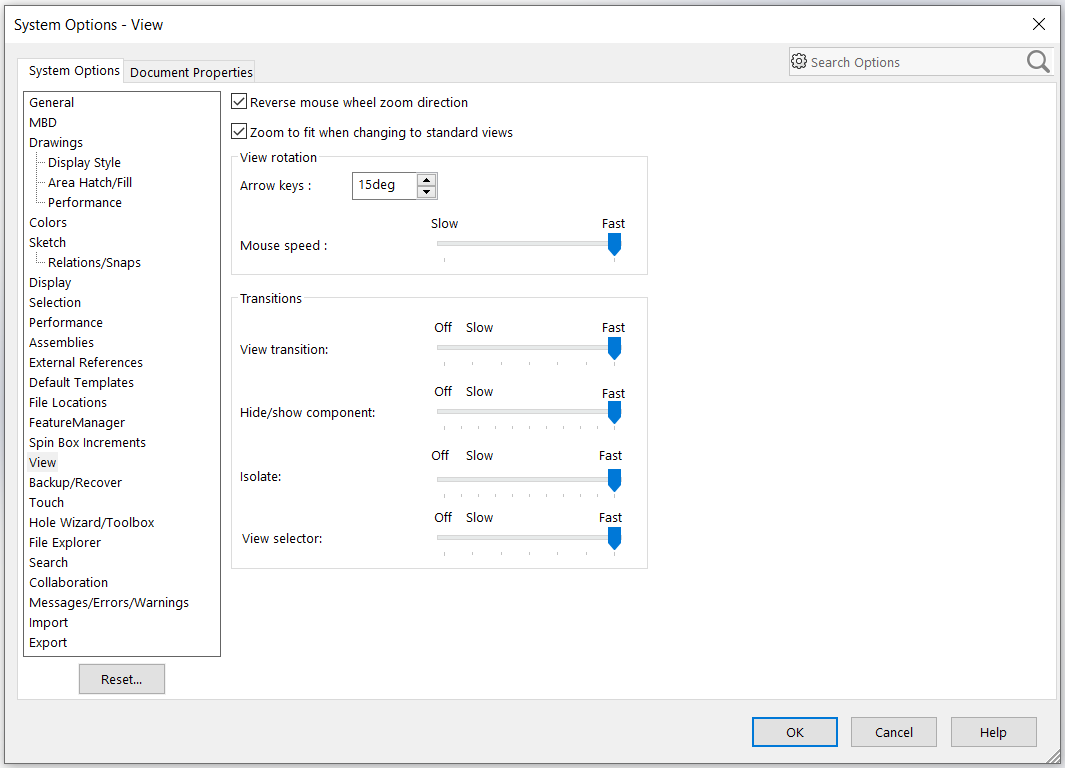
If your zoom feels backwards (common when switching between laptops, 3D mice, and different CAD tools), SOLIDWORKS includes an option to reverse the mouse wheel zoom direction so you can match your preference.
Mouse gestures (the fastest built-in customization)
Mouse gestures are a built-in shortcut system that lets you access tools (and even macros) by right-clicking and dragging in a direction. When you right-drag, a gesture guide appears and highlights the command mapped to that direction.
Modern SOLIDWORKS versions let you enable/disable mouse gestures and set the guide to 2, 3, 4, 8, or 12 directions. You can also configure gesture sets independently for different environments (such as Sketch, Part, Assembly, and Drawing), so the wheel shows the tools that actually make sense in each context.
Important assembly note: in assemblies, right-dragging over a component may rotate components instead of showing the gesture wheel. A common workflow is to right-drag in empty graphics space away from components, or use Alt + right-drag to invoke mouse gestures without triggering component rotation.
Scrolling and zoom behavior options
Beyond gestures, SOLIDWORKS includes view/navigation options that change how your mouse feels during daily work. Examples include reversing mouse wheel zoom direction and applying “zoom to fit” automatically when switching to standard views. These are small toggles, but they can eliminate friction if you frequently jump between orientations or work across multiple machines.
Customizing SOLIDWORKS Mouse Settings

Most worthwhile SOLIDWORKS mouse customization happens inside the Customize dialog. The exact menu names can vary slightly by version, but the overall workflow is consistent across recent releases.
Step-by-step: customize Mouse Gestures
- Open Tools > Customize.
- Go to the Mouse Gestures tab.
- Enable mouse gestures (if they are not already enabled).
- Select the number of gesture directions you want (2, 3, 4, 8, or 12). If you choose 2 gestures, you can typically pick a horizontal or vertical layout.
- Assign commands by dragging tools (or macros) from the command list onto the gesture guide slots.
- Switch environments (Sketch/Part/Assembly/Drawing) and repeat so each context has the right set of shortcuts.
- Optional: print or capture your gesture guide while you’re learning it, then simplify or expand later based on error rate.
Pro tip: start with 4 or 8 directions, and only move to 12 if you can hit directions reliably without slowing down. More gestures can be faster in theory, but they can also increase “wrong command” mistakes in practice.
Suggested gesture strategy (so it actually speeds you up)
A high-performing gesture wheel usually mixes two categories:
- Navigation resets you use constantly (think: view orientation, zoom to fit, normal-to, section view toggles).
- High-frequency creation/edit tools specific to the active environment (for example, sketch tools in Sketch mode and mates in Assembly mode).
Avoid filling gestures with rarely used commands. If you only trigger a tool once per day, it usually belongs in the command search, menu, or toolbar—not in your “muscle memory ring.”
SOLIDWORKS’ fastest customization features are mouse gestures and keyboard shortcuts. If you have a multi-button mouse, the most reliable approach is usually to:
- Bind the extra mouse buttons in your mouse software (Logitech, Razer, etc.) to send keyboard shortcuts (for example: a single letter, a key combo, or a macro sequence).
- Assign or customize those keyboard shortcuts inside SOLIDWORKS using Tools > Customize > Keyboard.
This gives you the best of both worlds: SOLIDWORKS gets a standard shortcut it understands, while your mouse becomes a physical “shortcut pad” you can hit without reaching across the keyboard.
Save and transfer your setup (Copy Settings Wizard / SOLIDWORKS Settings Wizard)
Once your mouse gestures, keyboard shortcuts, and UI feel right, protect your time investment.
SOLIDWORKS includes a built-in wizard to save and restore your settings (and, in newer versions, reset back to factory defaults). Depending on your version, it may appear as the Copy Settings Wizard or the SOLIDWORKS Settings Wizard. You can commonly access it from Tools > Save/Restore Settings (and often also from the Windows Start menu under SOLIDWORKS tools).
This is especially valuable if you:
- Upgrade SOLIDWORKS annually and want your shortcuts immediately.
- Use a desktop in the office and a laptop on-site.
- Support multiple designers and want consistent “house style” UI setups.
Advanced SOLIDWORKS Mouse & Input Workflows
After gestures and navigation fundamentals, the next productivity jump usually comes from combining inputs: mouse + keyboard shortcuts + automation.
Shortcut Bars (the “S” key) and context toolbars
The Shortcut Bar is a context-aware command palette (commonly opened with the S key) that you can customize per environment. It’s ideal for commands that you need frequently, but don’t want to memorize as gestures.
Context toolbars can also appear based on what you select, keeping likely commands close to the cursor and reducing trips to the CommandManager.
Macros: automate repetitive clicks
If you catch yourself repeating the same multi-step action sequence—especially when detailing, exporting, preparing files, or running consistent cleanup operations—consider recording a macro.
In many setups, you can:
- Record a macro from the macro tools, performing the steps once while SOLIDWORKS records the actions.
- Assign that macro to a toolbar button, a keyboard shortcut, or (in many workflows) a mouse gesture—so it becomes a single action.
Macros are not magic; they can break when geometry or selections change. But for stable, repeatable operations, they can be a major time saver.
Many advanced users pair a regular mouse with a 3Dconnexion SpaceMouse (or similar 3D navigation controller). This setup lets your left hand handle continuous 3D navigation (pan/zoom/rotate) while your right hand selects features, edits sketches, and triggers commands.
If you do a lot of assembly review, interference checks, or design iterations where you constantly move the camera, a 3D mouse can make navigation feel smoother and reduce “stop-start” motion compared to switching modifiers on a standard mouse.
Troubleshooting Common Mouse Issues
Even with perfect settings, SOLIDWORKS can occasionally feel “off”—especially after driver updates, a new service pack, a hardware change, or migrating settings to another machine.
Mouse gestures don’t appear (or parts rotate instead)
- Confirm mouse gestures are enabled in Tools > Customize > Mouse Gestures.
- In assemblies, right-drag in empty graphics space away from components to avoid rotating a component.
- If needed, use Alt + right-drag to invoke mouse gestures without triggering component rotation.
Zoom direction feels backwards
- Use the SOLIDWORKS option to reverse mouse wheel zoom direction so the wheel zoom matches your preference.
- If your mouse driver also offers a “natural scrolling” or reversed wheel setting, make sure you are not reversing the direction in two places at once.
- Verify you are running a certified graphics card/driver combination for your SOLIDWORKS version whenever possible.
- Use SOLIDWORKS Rx (where available) to review diagnostics and help identify the correct tested driver for your graphics hardware.
- If you suspect the issue is graphics-related, temporarily toggling certain display/performance options (such as enhanced graphics features) can help determine whether the graphics pipeline is the bottleneck. Always change one setting at a time so you know what actually helped.
- If the model itself is heavy, reduce what SOLIDWORKS must draw (hide components, simplify appearances, use configurations, or isolate subassemblies during edits).
- First, confirm the hardware: if the scroll wheel click is failing intermittently, SOLIDWORKS view control will feel broken no matter what settings you choose.
- Check your mouse software for application-specific profiles; a profile could be remapping MMB behavior only in SOLIDWORKS.
- As a workaround, you can always access rotate/pan/zoom tools from the View toolbar, but restoring reliable MMB input is typically the real fix.
Conclusion
Optimizing SOLIDWORKS mouse settings isn’t about making the software “fancy”—it’s about reducing friction. When view manipulation feels natural and your most-used commands are one gesture or one shortcut away, you spend more time designing and less time navigating the interface.
For most users, the best order of operations is:
- Dial in rotate/pan/zoom comfort (including scroll direction).
- Customize mouse gestures (start simple, then expand).
- Build a clean Shortcut Bar (S key) and a small set of keyboard shortcuts.
- Add macros only where repetition is truly consistent.
- Save your settings so upgrades and new machines don’t wipe out your workflow.
If you do these five things well, SOLIDWORKS stops feeling “menu-heavy” and starts feeling like a fast, personal tool built around how you actually work.


